I decided to strip down and start again with my character idea, because I had made it to detailed and complex for the length of time it has to be done in.
I gathered inspiration from my mood board and wanted to reflect the inner evil of Mr Hyde within my character design. I wanted to show a charasimatic man with fluffy dark brows, contoured cheek bones , however dark bruised sinister eyes which were evil like, to reflect his madness as his character.
I wanted to capture his look after going out to commiting crimes for example when he knocked down the girl in the car. To capture his madness, with bruised eyes to reflect his insanity and tiredness.
I also wanted to create an off pale face but not too pale a slight shade lighter with contour to hollow out the cheeks and divine the cheek bones to also shade the sides of the forehead to drew the face in.
Before this I decided to buy a moustache, cut it to shape and style it, attaching it to my model on the day of the assessment. As I visualised Mr Hyde with a dainty, charming moustache keeping his masculine. I used a black moustache to keep with the hair colouring.
With the lips I wanted them darkish, uneven purple/black tones with dabs of fake blood dotted on the lips, as if he had just bitten them in frustration and tension, Caused by his madness.
Here is my final face chart I created to go with my final look practice.

Practicing with my bruise palette, seeing how it turned out in order to make changes if needed and to test and error, I feel this helped me decide what products were right or wrong and same with the brushes. I tested out the bruise wheel black on the eye brows but realised it wasn't right when it turned out blue instead, luckily I tried this before my assessment, therefore I changed and used the supra color black as I knew from previous lessons and testing this out, that it works well.

A few images of testing products out on my model

I loved my Mehron Bruise wheel It gave the eye colouring what I was after and looked very effective, to create the creepy, tired, insane look, I also enjoyed mixing the colours and testing them out for the first time.


I did 90% of what I wanted as a few products were missing to finish off the look completely. But however, this gave me an understanding of how it will look in the final assessment.
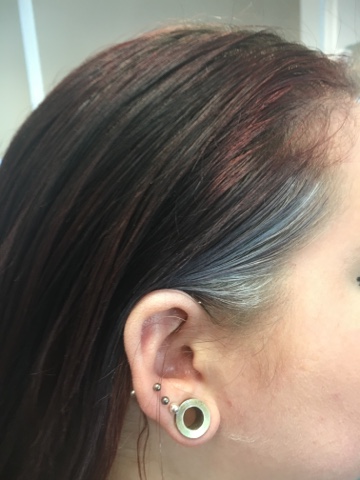
Practicing my final hair design for Mr. Hyde
Final Hair chart Design below with images of the end results. I carried my design on my model, to test and see what it would look like, it was effective enough with it simplicity of the design, I wanted to keep it simple so I could create it again exactly the same both times. I really liked it sleeked back, with a wet look effect and just adding in the supra color white at the sides with using a wand created a simple but effective look.

A few images of the end result, from my hair chart to my model


The moustache I ordered for my final look...
The moustache, I ordered because of the research into the victorian times, I felt it was a good idea to incorporate this into my design. It arrived flat and lifeless, I then got some direction from one of my lecturers on how to cut and style it properly. I then heated up the iron rods, making sure I used them with caution, whilst these were heating up, I started trimming the moustache into the right shape as it was very shapeless and then curled in a particular motion working outwards to create a curled effect. When I had finish this process, I used moustache wax and hair spray to set the shape and pinned it onto the 'pin head' so it could fix and hold shape until my assessment. I was very pleased with the outcome of the moustache piece and I loved the look of it on my model, I feel it really finished off my design look.

No comments:
New comments are not allowed.